see also
A Lifecycle is an automated routing slip. Use lifecycles to simplify common routing sequences.
Creating a Lifecycle
Lifecycles are created from the WORKFLOW > LIFECYCLE DESIGNER > NEW menu item. Lifecycles that you create belong to you, and are only visible to you.
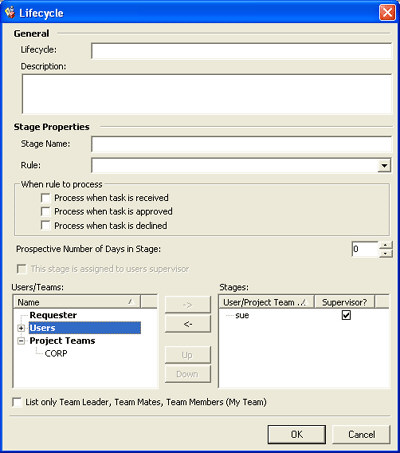
The Lifecycle Designer appears, which allows you to select and sequence the members of your new Lifecycle.
Name your lifecycle and provide a brief description.
Specify stage properties such as stage name and rule applicable, if any. Indicate when the rule to process: when task is received, approved or declined. You may also indicate a prospective number of days in the Stage.
Select the team members or workshop with which you would like to include in your Lifecycle by clicking on the User ID in the user list on the left. By default, this list contains all members. Checking the appropriate option, you may list the members of your team: Team Leader, Teammates, Team Members, and yourself. If this list is empty, then no users have established you as their Team Leader. Provide a name for the function that the user will achieve, and press the right arrowhead to move the user to the Lifecycle.
You may assign the stage to users supervisor, using the appropriate option. If the stage assigned to users supervisor, it will be indicated in the supervisor column on the right within the Lyfecycle.
Use the up and down arrowheads to sequence users.
Use the left arrowhead to remove users from the Lifecycle.
